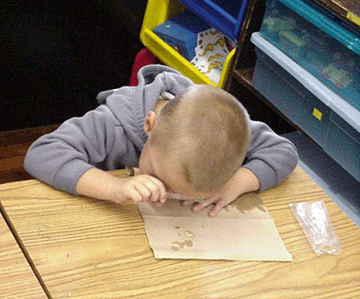
Soak some pumpkin seeds overnight. Then cut them open so the children can see the tiny plant inside the seed.
Pumpkin Life Cycle Sequencing – Make a pumpkin sequencing story with pieces stored in a paper plate pumpkin.
Pumpkin Report
Complete a pumpkin report. Draw a picture of the pumpkin above this sentence: “This is our pumpkin.”
Under the sentence, “Our pumpkin is:” have a picture of three pumpkins (little, medium, big) and circle the size of the class pumpkin.
Count the seeds and fill in, “Our pumpkin has _____ seeds.”
Glue some seeds in a box labeled: “Here are some seeds.”
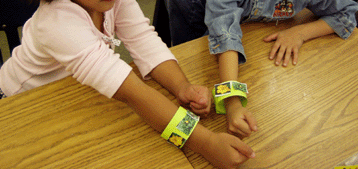
Make pumpkin life sequence bracelets.
Plant pumpkin seeds in a ziplock bag filled with a small amount of soil and water. Zip the bags shut and watch the bag fog up and clear again (just like the water cycle). Record their growth.
Relate a pumpkin to the five senses. Describe how it looks, what you can hear if it is shaken, how it smells before it is opened and after it is opened, how it feels inside and out, and how it tastes (pulp and seeds).
Make a yes-no class graph titled, “Will Pumpkins Float?” Have each student tape a small pumpkin with their name on it on the graph to record their predictions. Test a small pumpkin by placing it in a plastic container filled with about 6 inches of water.
Open a pumpkin and have each child scoop out some stringy pulp and seeds on to a paper plate. Explore these by using a magnifying glass. Separate the seeds from the pulp and save for math and cooking activities.
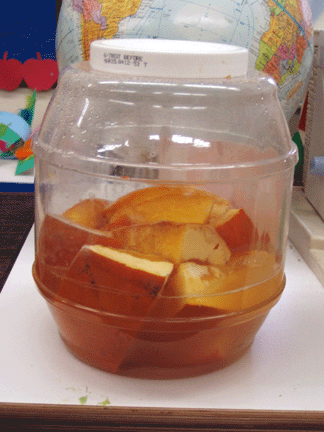
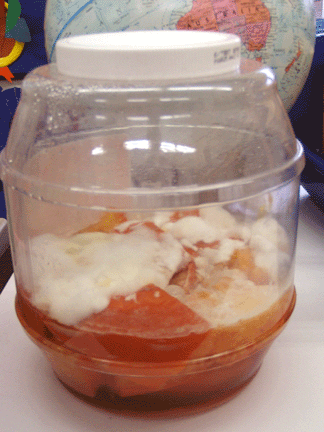
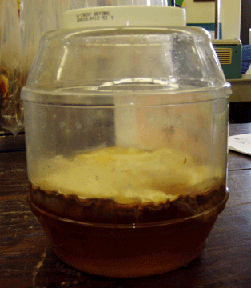
After Halloween, place the class pumpkin in a large clear container to observe changes. Take photos or draw pictures to record these changes on a timeline. Changes might include mold, color change, smell, and fruit flies. There is a book called Pumpkin Jack that goes along well with this experience. The second picture is the way Pumpkin Jack looked after one month. The last picture is the way it looked in January; under the mold it has turned to mainly a liquid. We couldn’t stand looking at it any longer so we threw it out.
